
GitLab Pages maintains web sites of static pages directly from a repository in GitLab. UVM Gitlab does not directly support hosting Gitlab Pages; however, you can get similar results using Gitlab CI to deploy sites to the Silk web hosting platform.
Deployment setup
Prerequisites
Request a silk account or a subsite for an existing account.
Create a Gitlab repository, if you have not already done so. Visit gitlab.uvm.edu/dashboard/projects and click New project.
Allow Gitlab CI to log in to the silk site
-
Generate an SSH keypair by running the following command:
ssh-keygen -C "Gitlab CI"When prompted for a location, save the key to a file named gitlab_ci somewhere under your home directory. Do not enter a passphrase.
If you create your keys on silk, do not save them towww-root/or any subsite root, which would make your private key accessible by the web and is a security risk. -
Permit login access to the silk account using the new SSH public key.
If you created the keypair from Linux or macOS
Type the following. Substitute the path where you saved the files, ensuring you use the public key file ending in
.pub.ssh-copy-id -i <path-to-keypair>/gitlab_ci.pub <mynetid>@w3.uvm.eduIf you created the keypair from Windows
Windows does not include an
ssh-copy-idcommand, but you can do the equivalent by typing the following. Substitute the path where you saved the files, ensuring you use the public key file ending in.pub.ssh <mynetid>@w3.uvm.edu "mkdir -p ~/.ssh; chmod 700 ~/.ssh" type %USERPROFILE%\<path-to-kepair>\gitlab_ci.pub | ssh <mynetid>@w3.uvm.edu "cat >> ~/.ssh/authorized_keys" -
Save your SSH private key as a Gitlab project variable.
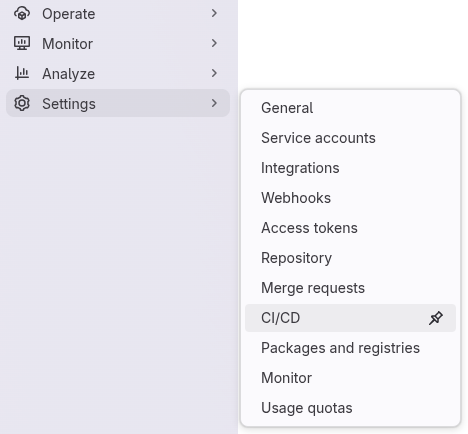
3.1. In your Gitlab project, from the left menu bar, navigate to Settings > CI/CD.
3.2. Expand the Variables section, then click CI/CD Variables > Add variable.
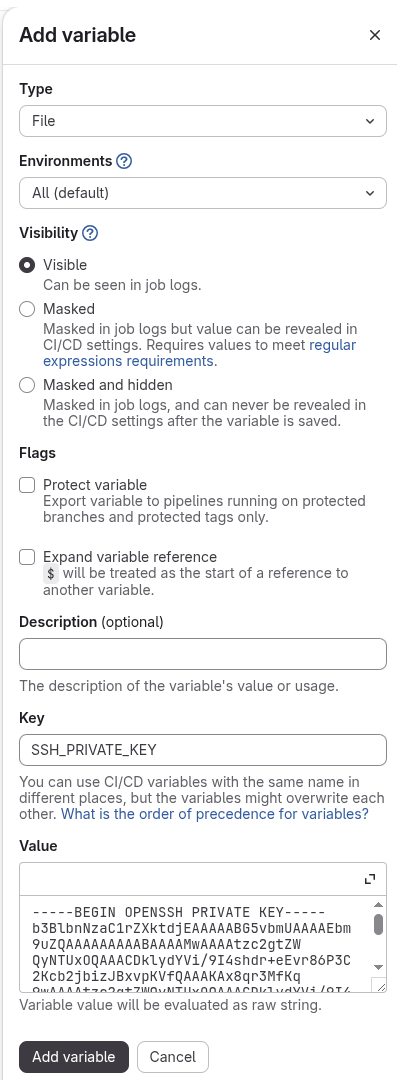
3.3. Fill out the Add variable form as follows:
Type File Visibility Visible Protect variable (leave unchecked) Key SSH_PRIVATE_KEYValue Copy the contents of your SSH private key (e.g. ~/.ssh/gitlab_ci) here.
Ensure the contents end with a newline.The form should look similar to this:
3.4. Click the Add variable button.
Configure Gitlab CI
.gitlab-ci.yml file.
-
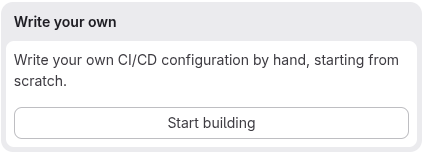
To create a new CI configuration for your Gitlab project, click + Set up CI/CD in the right menu bar and choose Write your own > Start building.
-
Replace the default contents of the CI configuration with something resembling the following. This is an example CI configuration to deploy the contents of a Gitlab project to a silk site using SSH key authorization. It’s likely you will need to customize this to your particular needs. Complete documentation for Gitlab CI can be found here.
Add your NetID and silk site directory to the template in the variables section. If you are using your default silk space, your silk root directory will be “www-root”. If you are using a subsite, the directory will be something like
<subsite>.w3.uvm.edu-root. Your Silk environment may vary.image: alpine:latest variables: netid: <mynetid> # Enter the actual netid for your silk account here silkspace: gitlab-test.my_silk_account_id # Enter everything preceeding .w3.uvm.edu pages: stage: deploy script: ## Configure environment to use SSH keys - apk --update add openssh rsync - install --directory --mode 0700 ~/.ssh - install --mode 644 /dev/null ~/.ssh/known_hosts - eval $(ssh-agent -s) ## Add the SSH key stored in SSH_PRIVATE_KEY variable to the agent store ## We're using tr to fix line endings which makes ed25519 keys work ## without extra base64 encoding. ## https://gitlab.com/gitlab-examples/ssh-private-key/issues/1#note_48526556 - cat "$SSH_PRIVATE_KEY" | tr -d '\r' | ssh-add - > /dev/null - ssh-keyscan silk.uvm.edu >>~/.ssh/known_hosts ## Sync the contents of 'public' to your www-root - rsync -avz public/* "$netid"@silk.uvm.edu:www-root/ ## alternatively, publish to a sub-site #- rsync -avz public/* "$netid"@silk.uvm.edu:"$silkspace".w3.uvm.edu-root/ artifacts: paths: - public only: - main -
Commit the changes.
Each time you push a new commit to your project, Gitlab will automatically redeploy your site. You can see the status of the deployment by navigating to Build > Jobs > pages.
Troubleshooting
In addition to the issues listed here, Gitlab’s documentation has a troubleshooting section covering some common SSH pitfalls: https://docs.gitlab.com/ci/jobs/ssh_keys/#troubleshooting
- Error: Permission denied (publickey,gssapi-keyex,gssapi-with-mic,password)
- You added a passphrase to your ssh private key, or you have named your ssh private key variable something
other than
SSH_PRIVATE_KEY. Ensure your variable is named correctly. If the variable is named correctly you may need to make a new key pair and upload it to Gitlab and Silk. - Error: Files Not Found
- Check that your HTML files are in the
publicfolder or you have edited the paths variable in the template to be the correct location. - Error: Error loading key “(stdin)”: error in libcrypto: unsupported
- This can happen when the SSH key value does not end with a newline (
LFcharacter). To resolve this issue, edit the file type CI/CD variable and press Enter or Return at the end of the-----END OPENSSH PRIVATE KEY-----line of the SSH key before saving the variable.
Advanced
- Changing the static file path
- To store static files stored in a directory other than
public, underartifiacts:->paths:changepublicto the directory you want to use. - Changing the Git deployment branch
- The default template will only deploy the “main” branch. To deploy a different branch
in the
gitlab-ci.ymlfile, underonly:changemainto the branch you wish to deploy.